Prewar co-op? Why, yes please. Inlaid wood floors? Check. High ceilings? Check. Arched doorways? Check. An abundance of charm? Most definitely. With all these features already in place, this co-op needed just a little assistance to bring it up to its full potential, a way to marry the old school loveliness with the needs of a modern day couple.
So here we go. For these clients, the dining room was a priority. Directly adjacent to the kitchen, it was clear that this would be the primary hangout area. Below is the before photo with the prior owner's belongings.
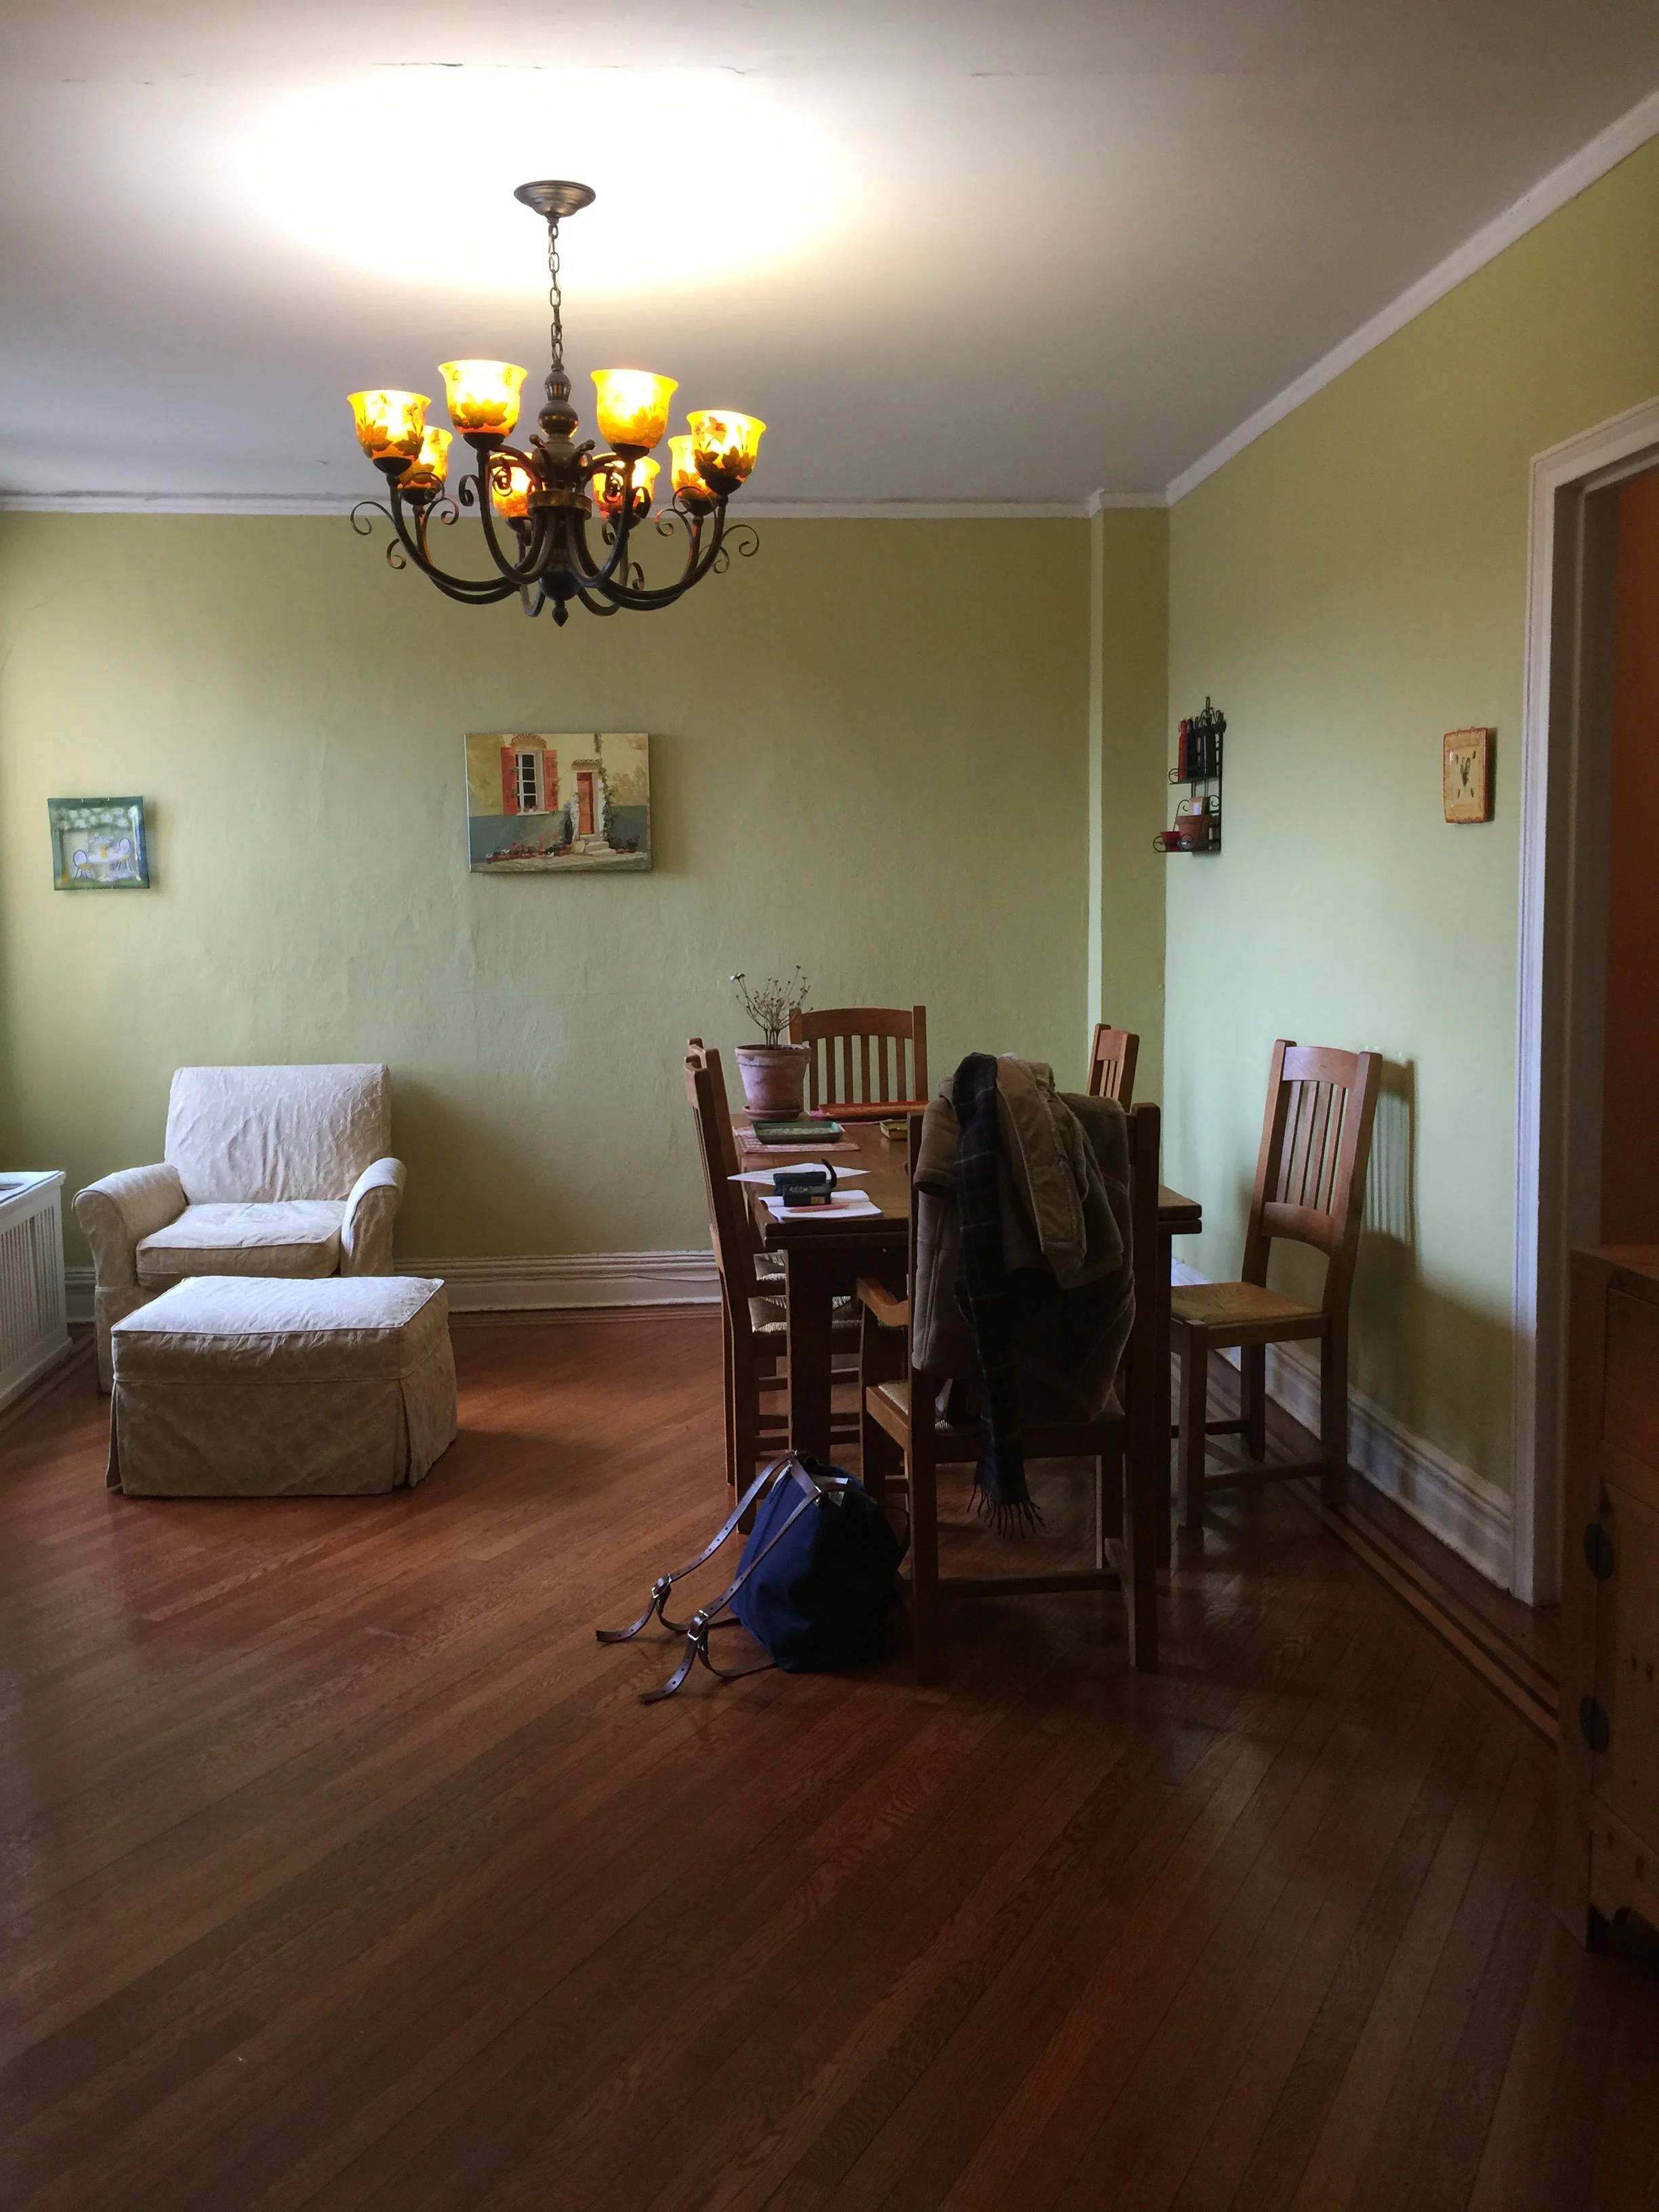
So yeah . . . the paint color. Reminds me of honeydew. Maybe it would work in another space in another home in another decade, but definitely doesn't work here. And the chandelier? Definitely didn't fit with the clients' modern aesthetic preferences. It was time for a change. Below is the after!
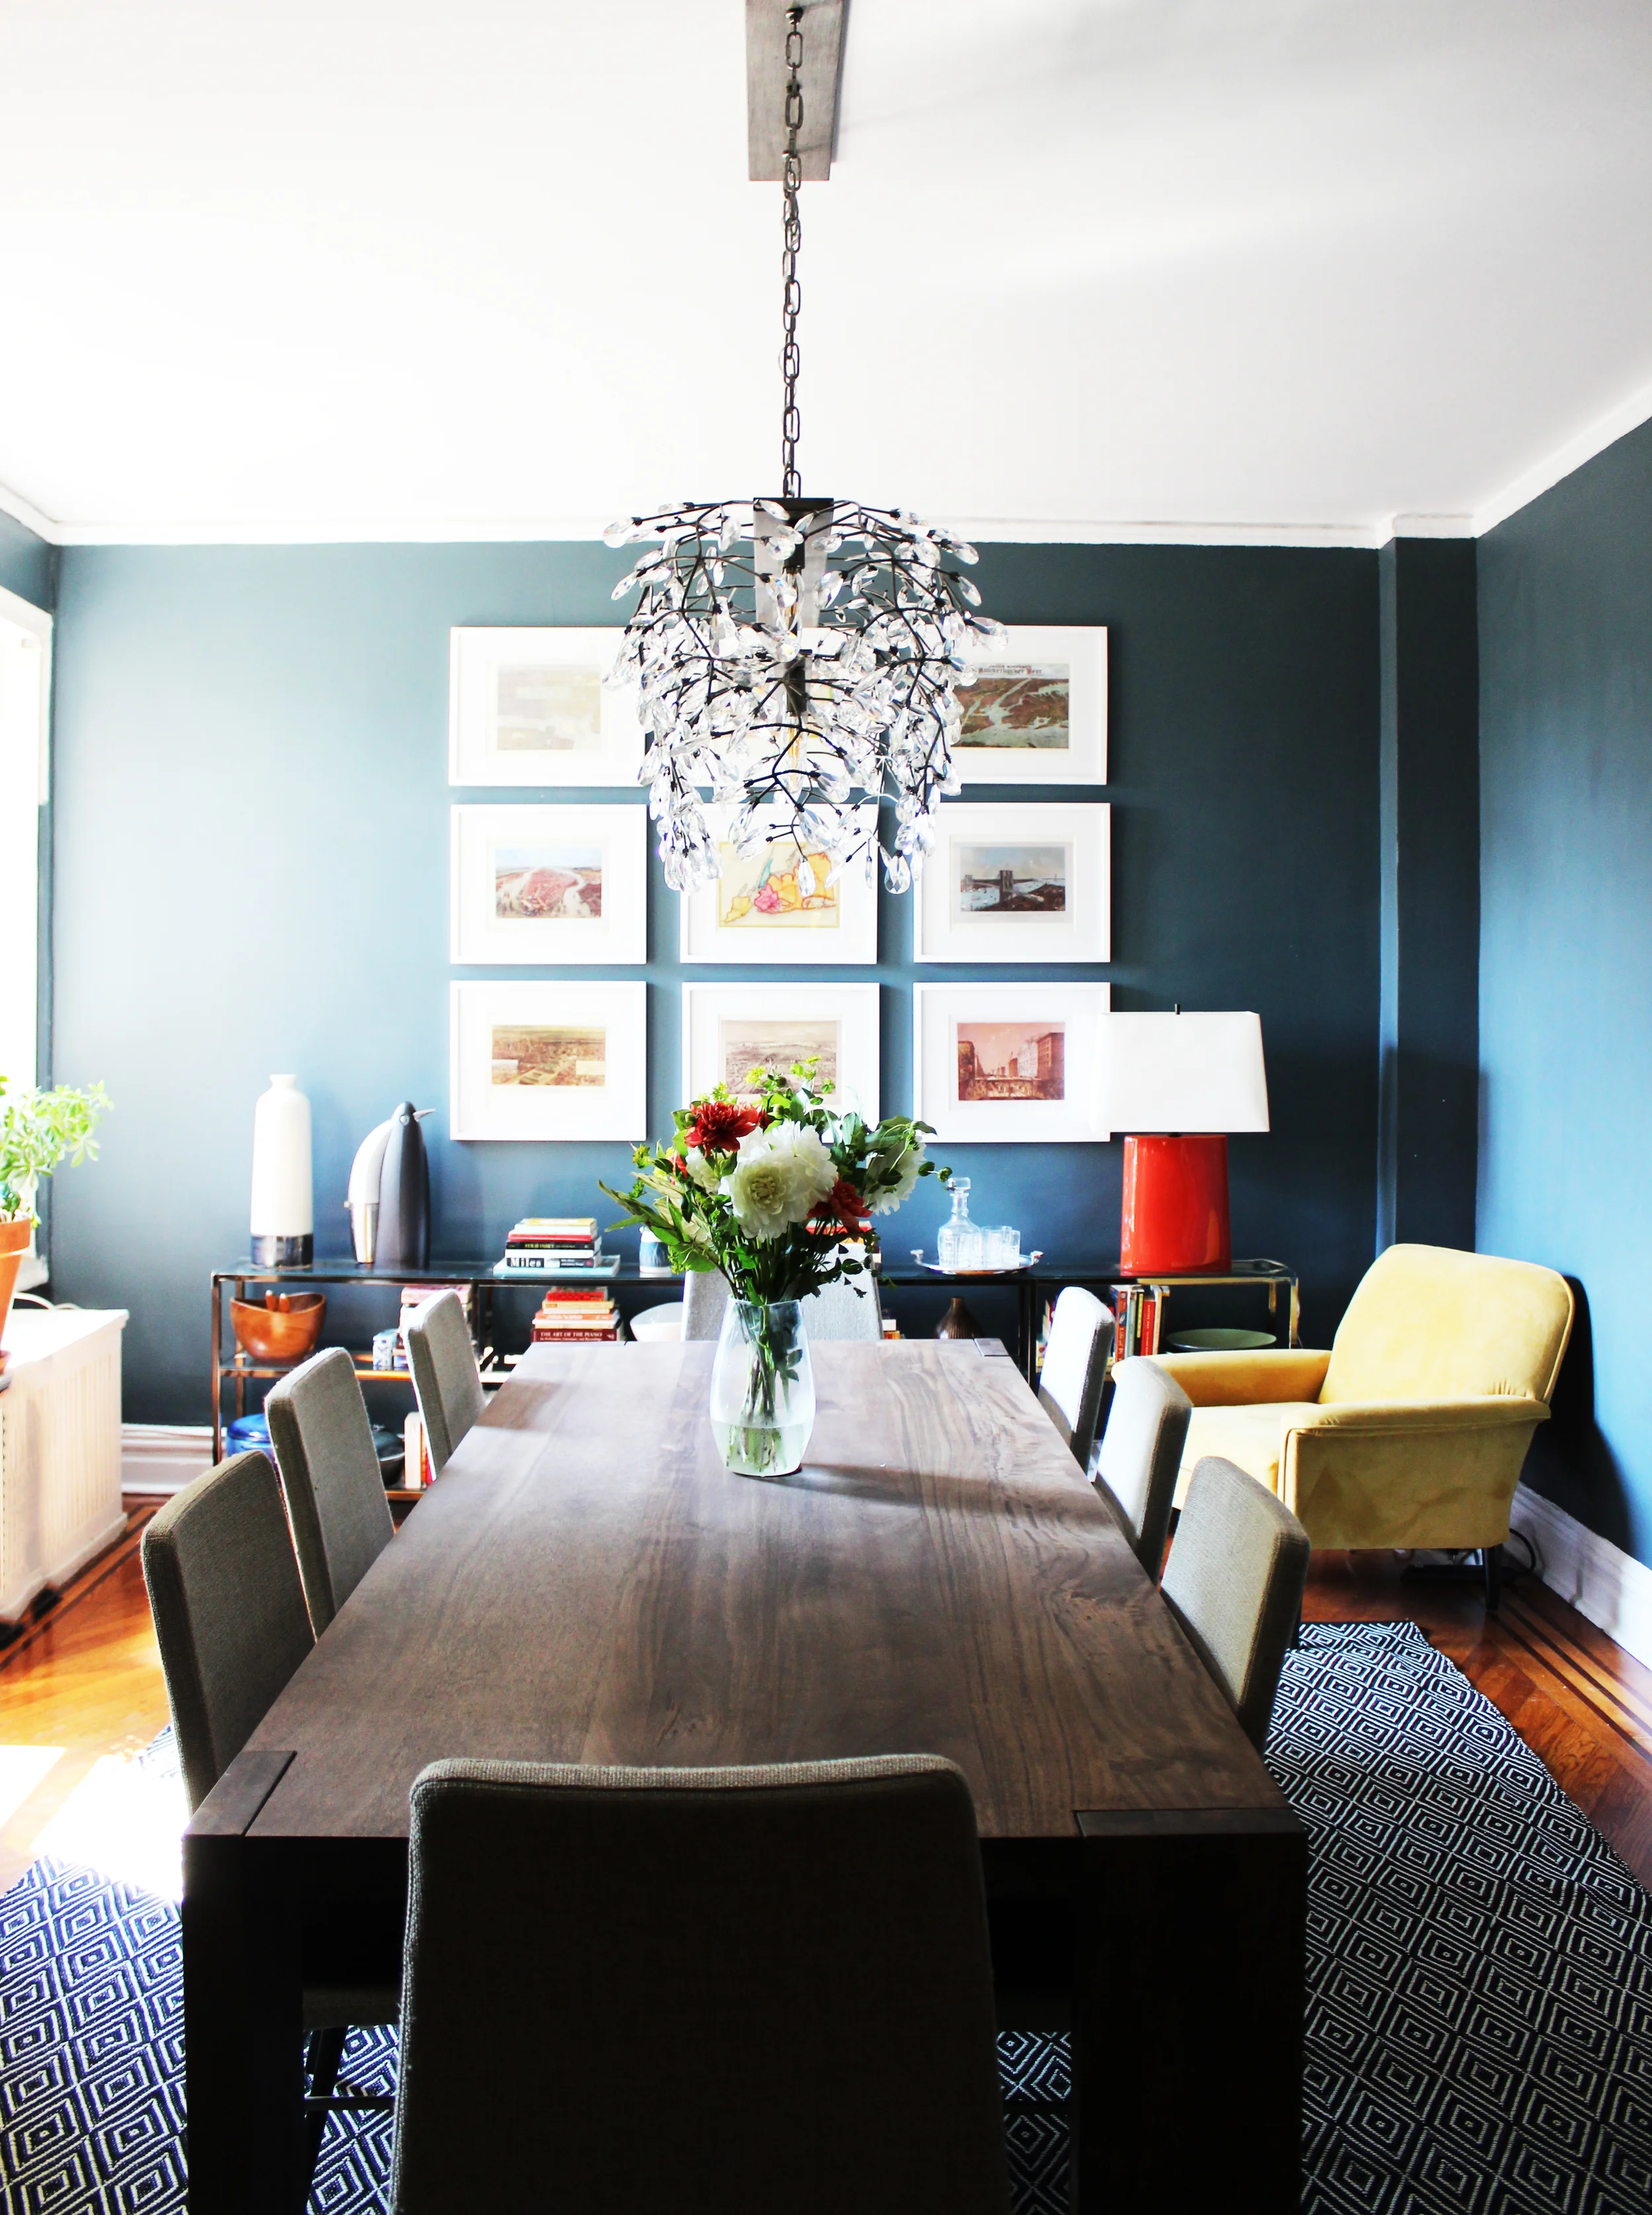
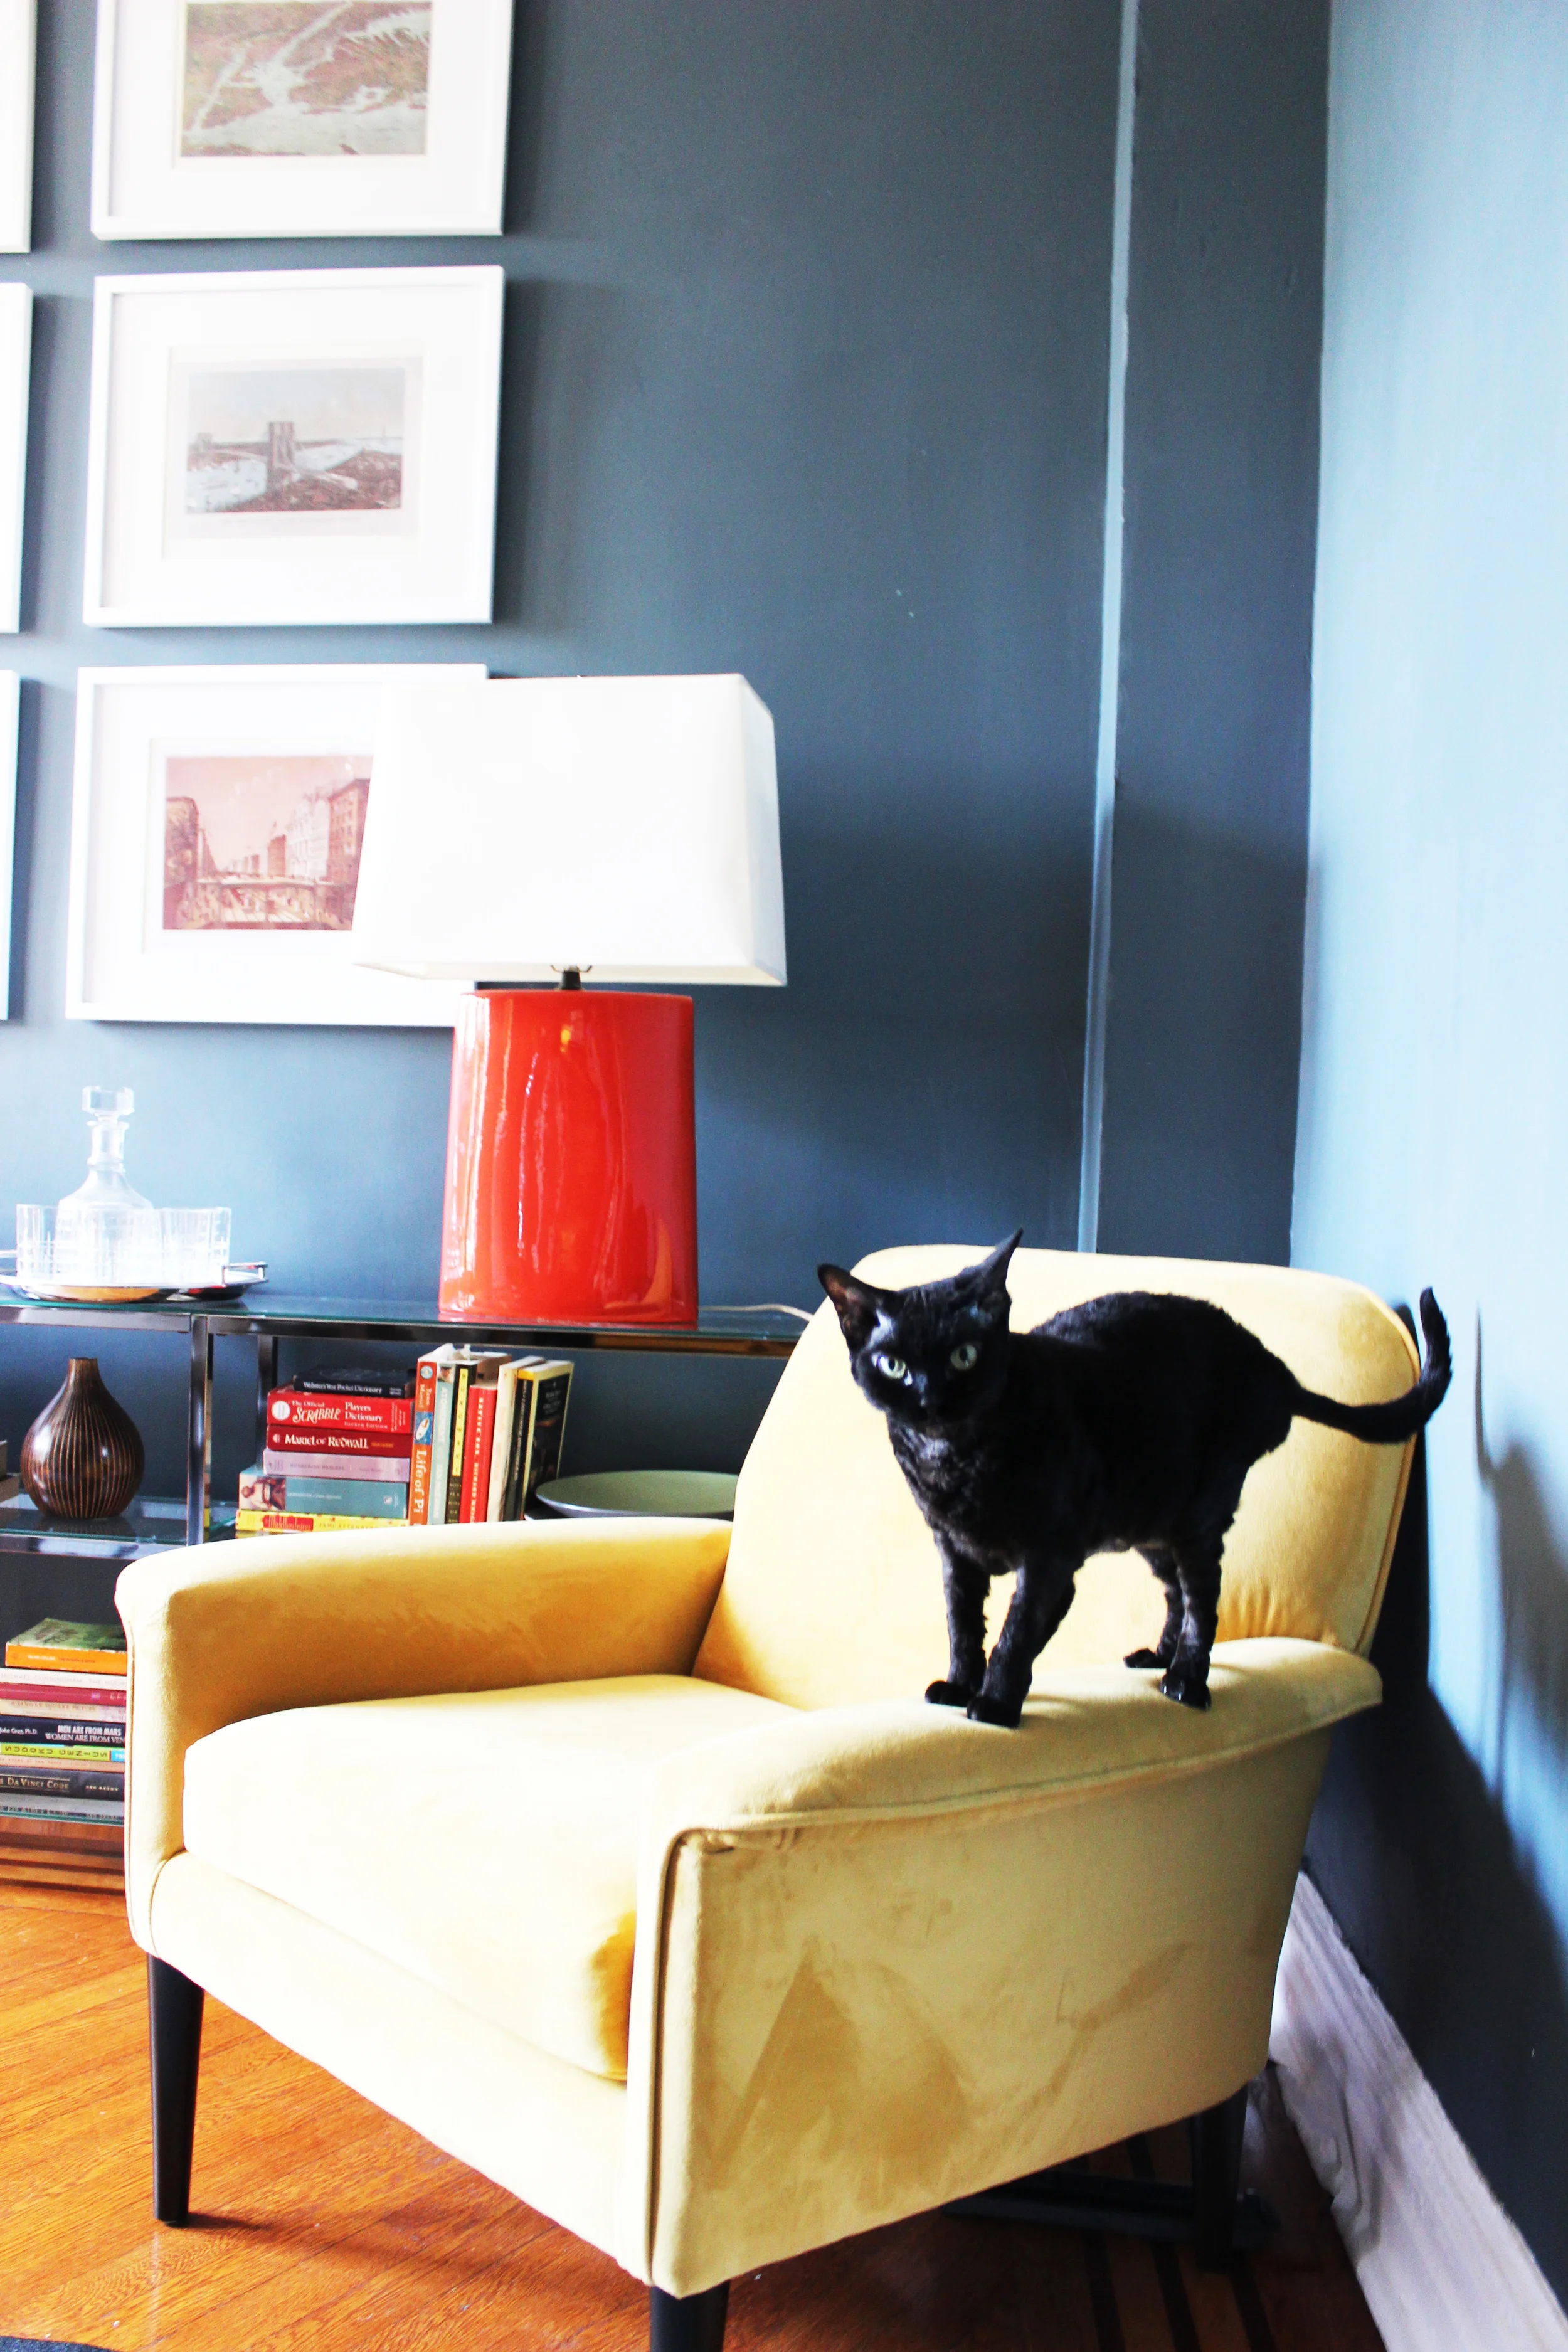
Dinner party ready! I'm obsessed with this room. The gray blue walls set the ideal mood. Facing east, the abundance of natural light throughout the day also ensures that this room remains light and bright despite the darker hued walls. The yellow velvet sitting chair provides the ideal reading corner so that the dining room is an attractive place to hang out during the day as well. Clearly, Sydney approves and agrees.
So I know you're dying to know what's on the walls and a better look at the lighting situation. Take a look below.
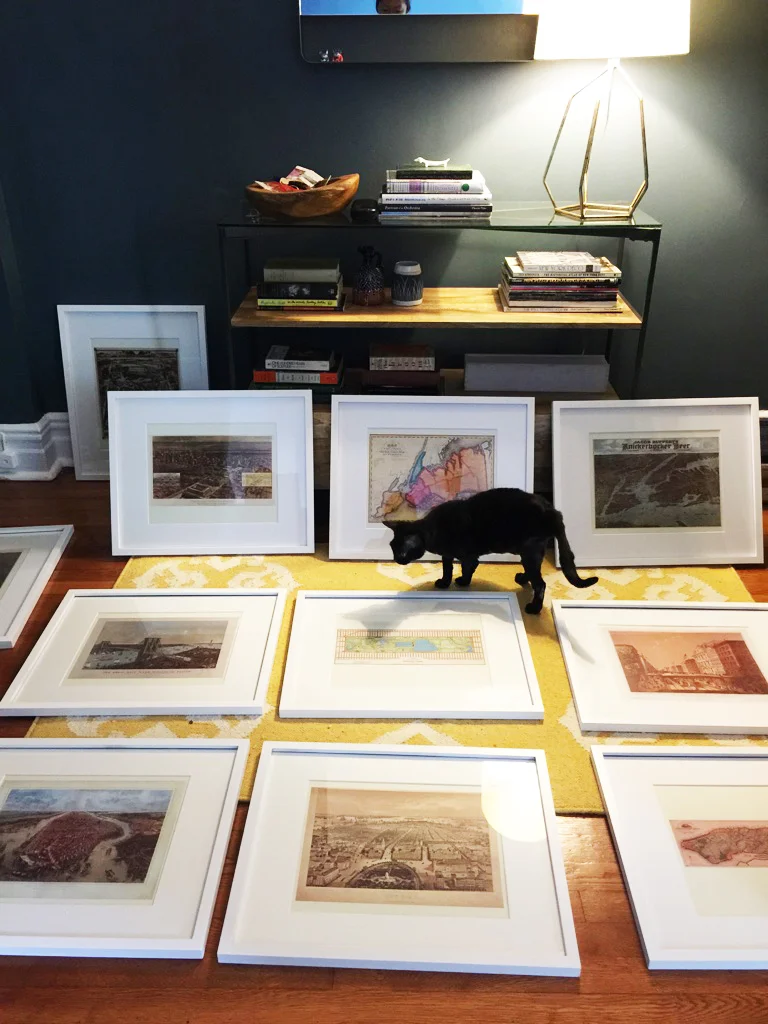
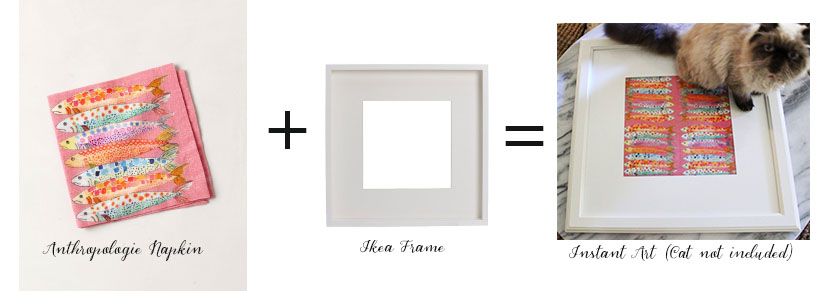
The clients had saved these prints of New York vintage maps and cityscapes to display in their very first home. After having them framed, we laid them out on the floor (with no help from Sydney) to see which configuration would work the best. The color and detail on these maps are amazing. Confession, installing gallery walls is probably my least favorite thing to do, right below assembling Ikea furniture. But they are often worth the effort as can be seen here.
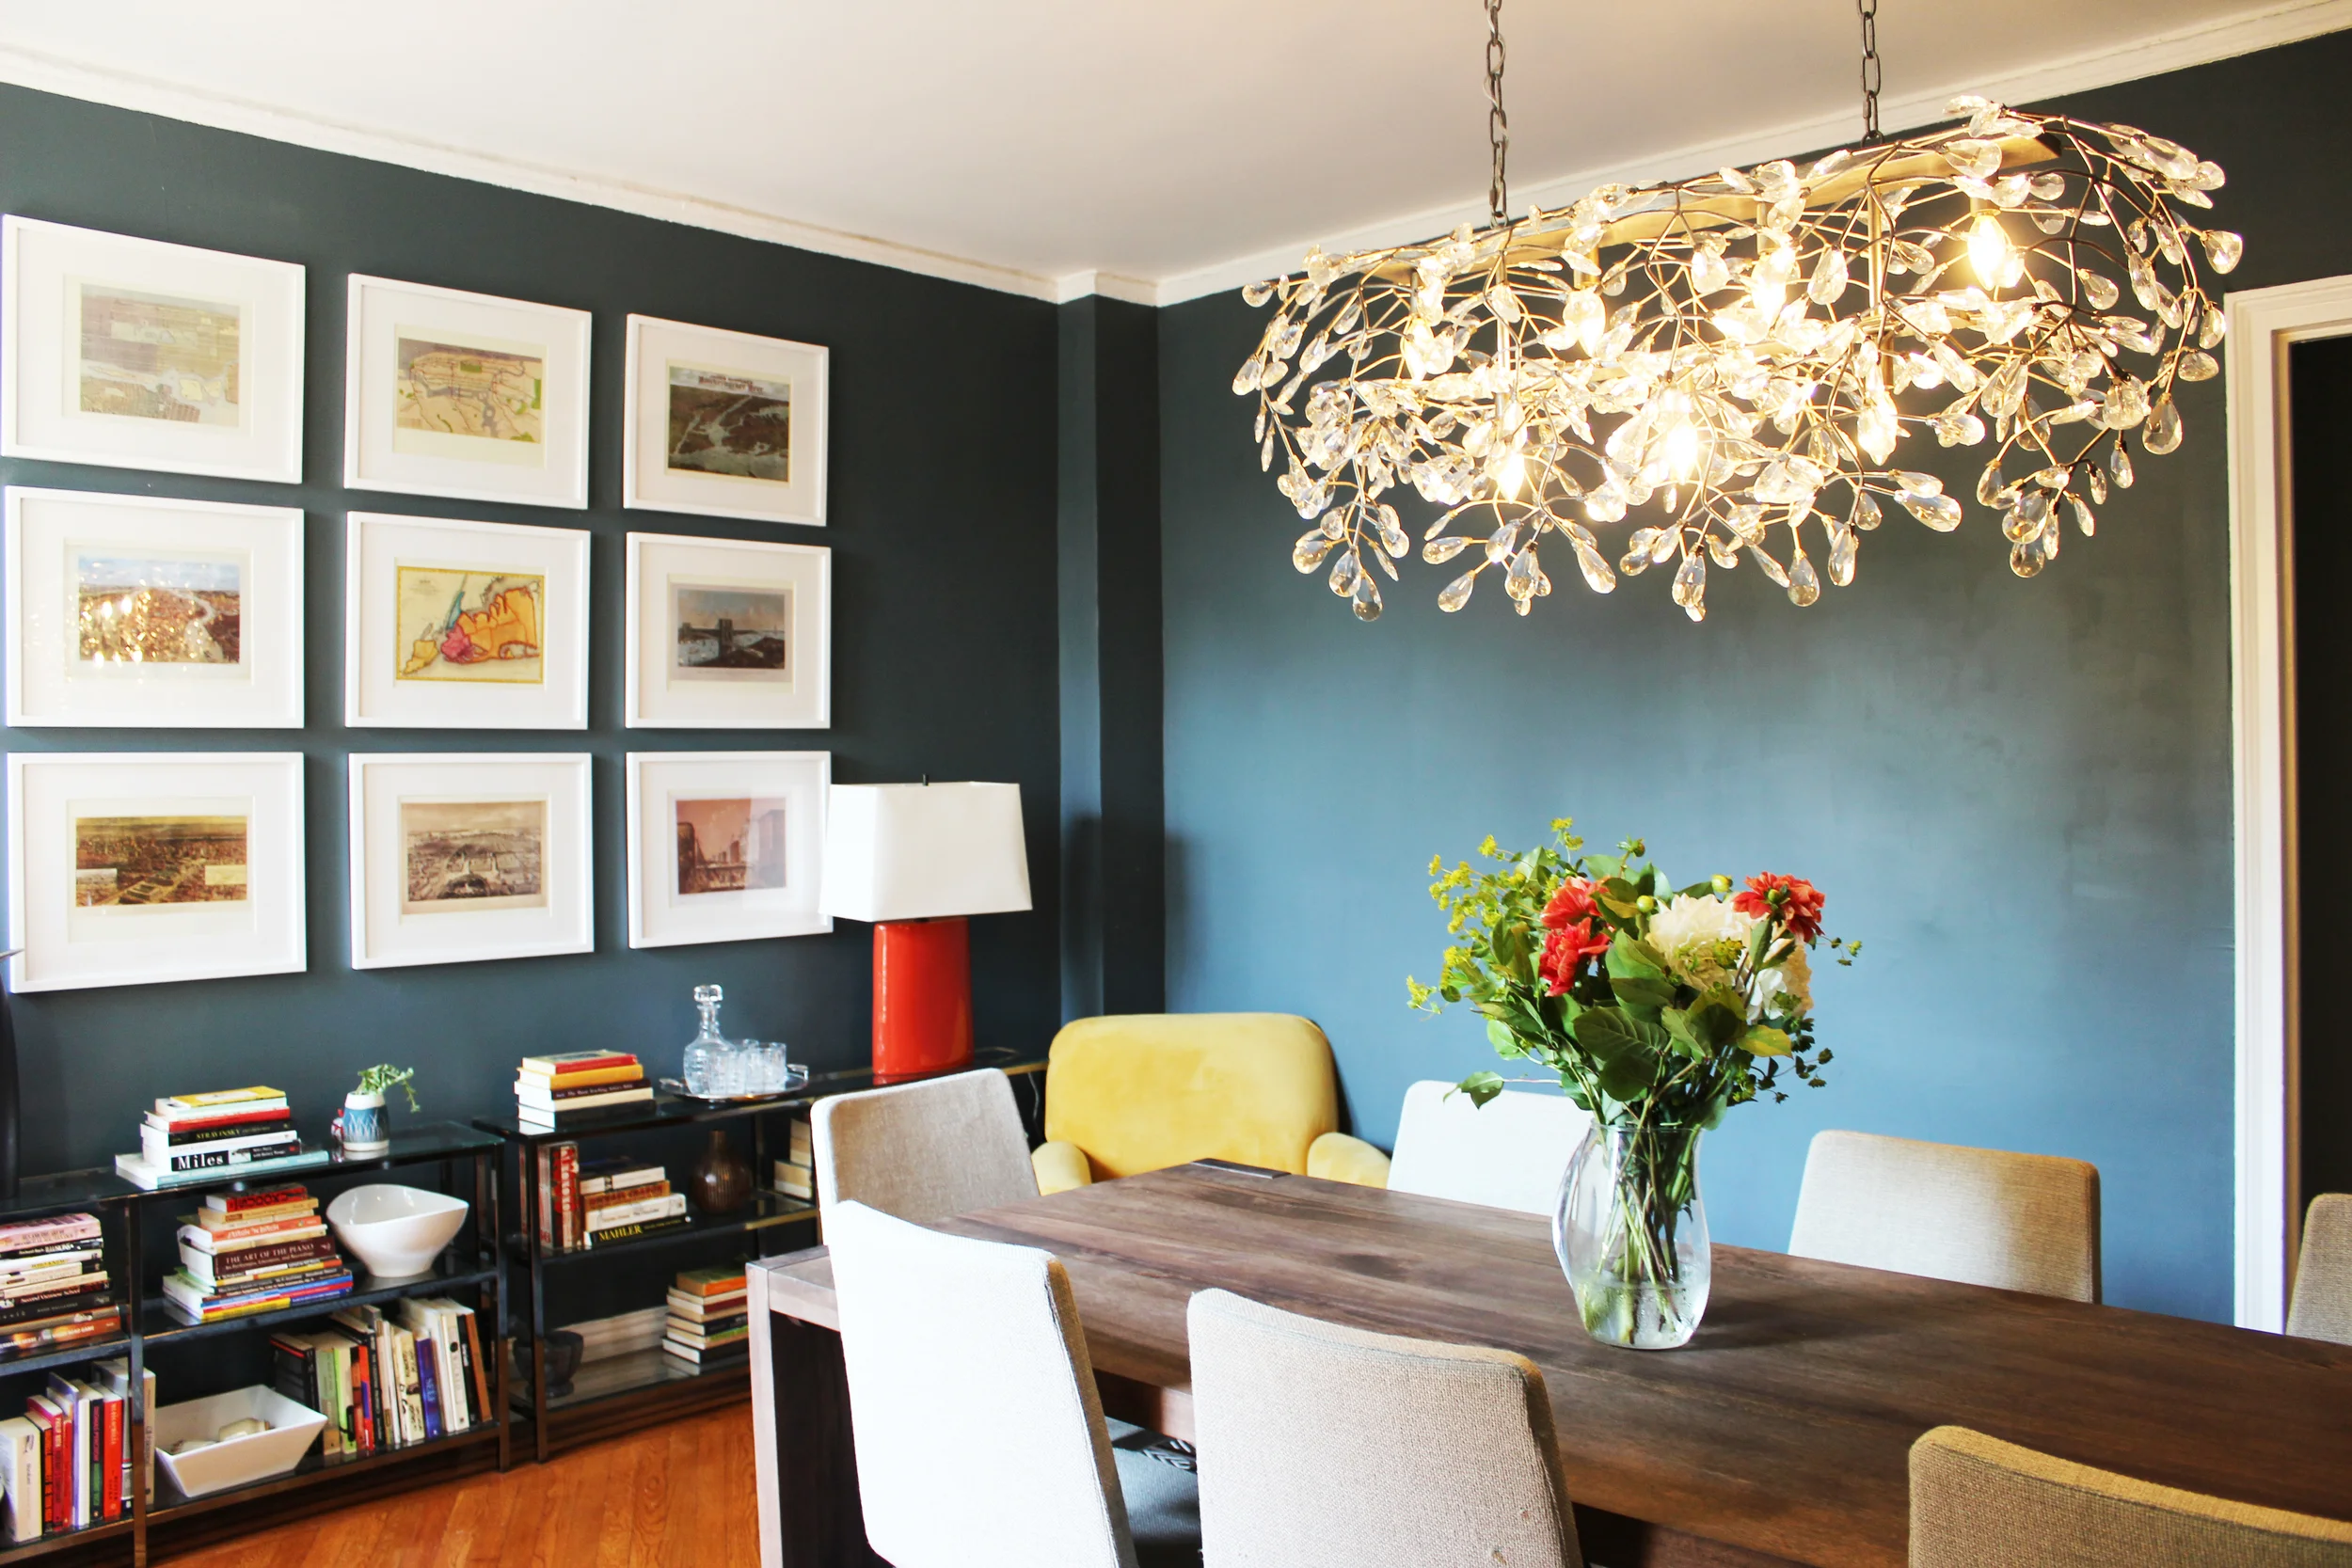
Also that wonderful chandelier that gives off the most beautiful sparkly light? Each of those crystals were hand screwed in by the client and me on one of the hottest most humid New York summer days. To all future dinner party guests, you're very welcome! I know all good things take effort, but we really earned it in this instance. Let's move onto the foyer. Here is the before.
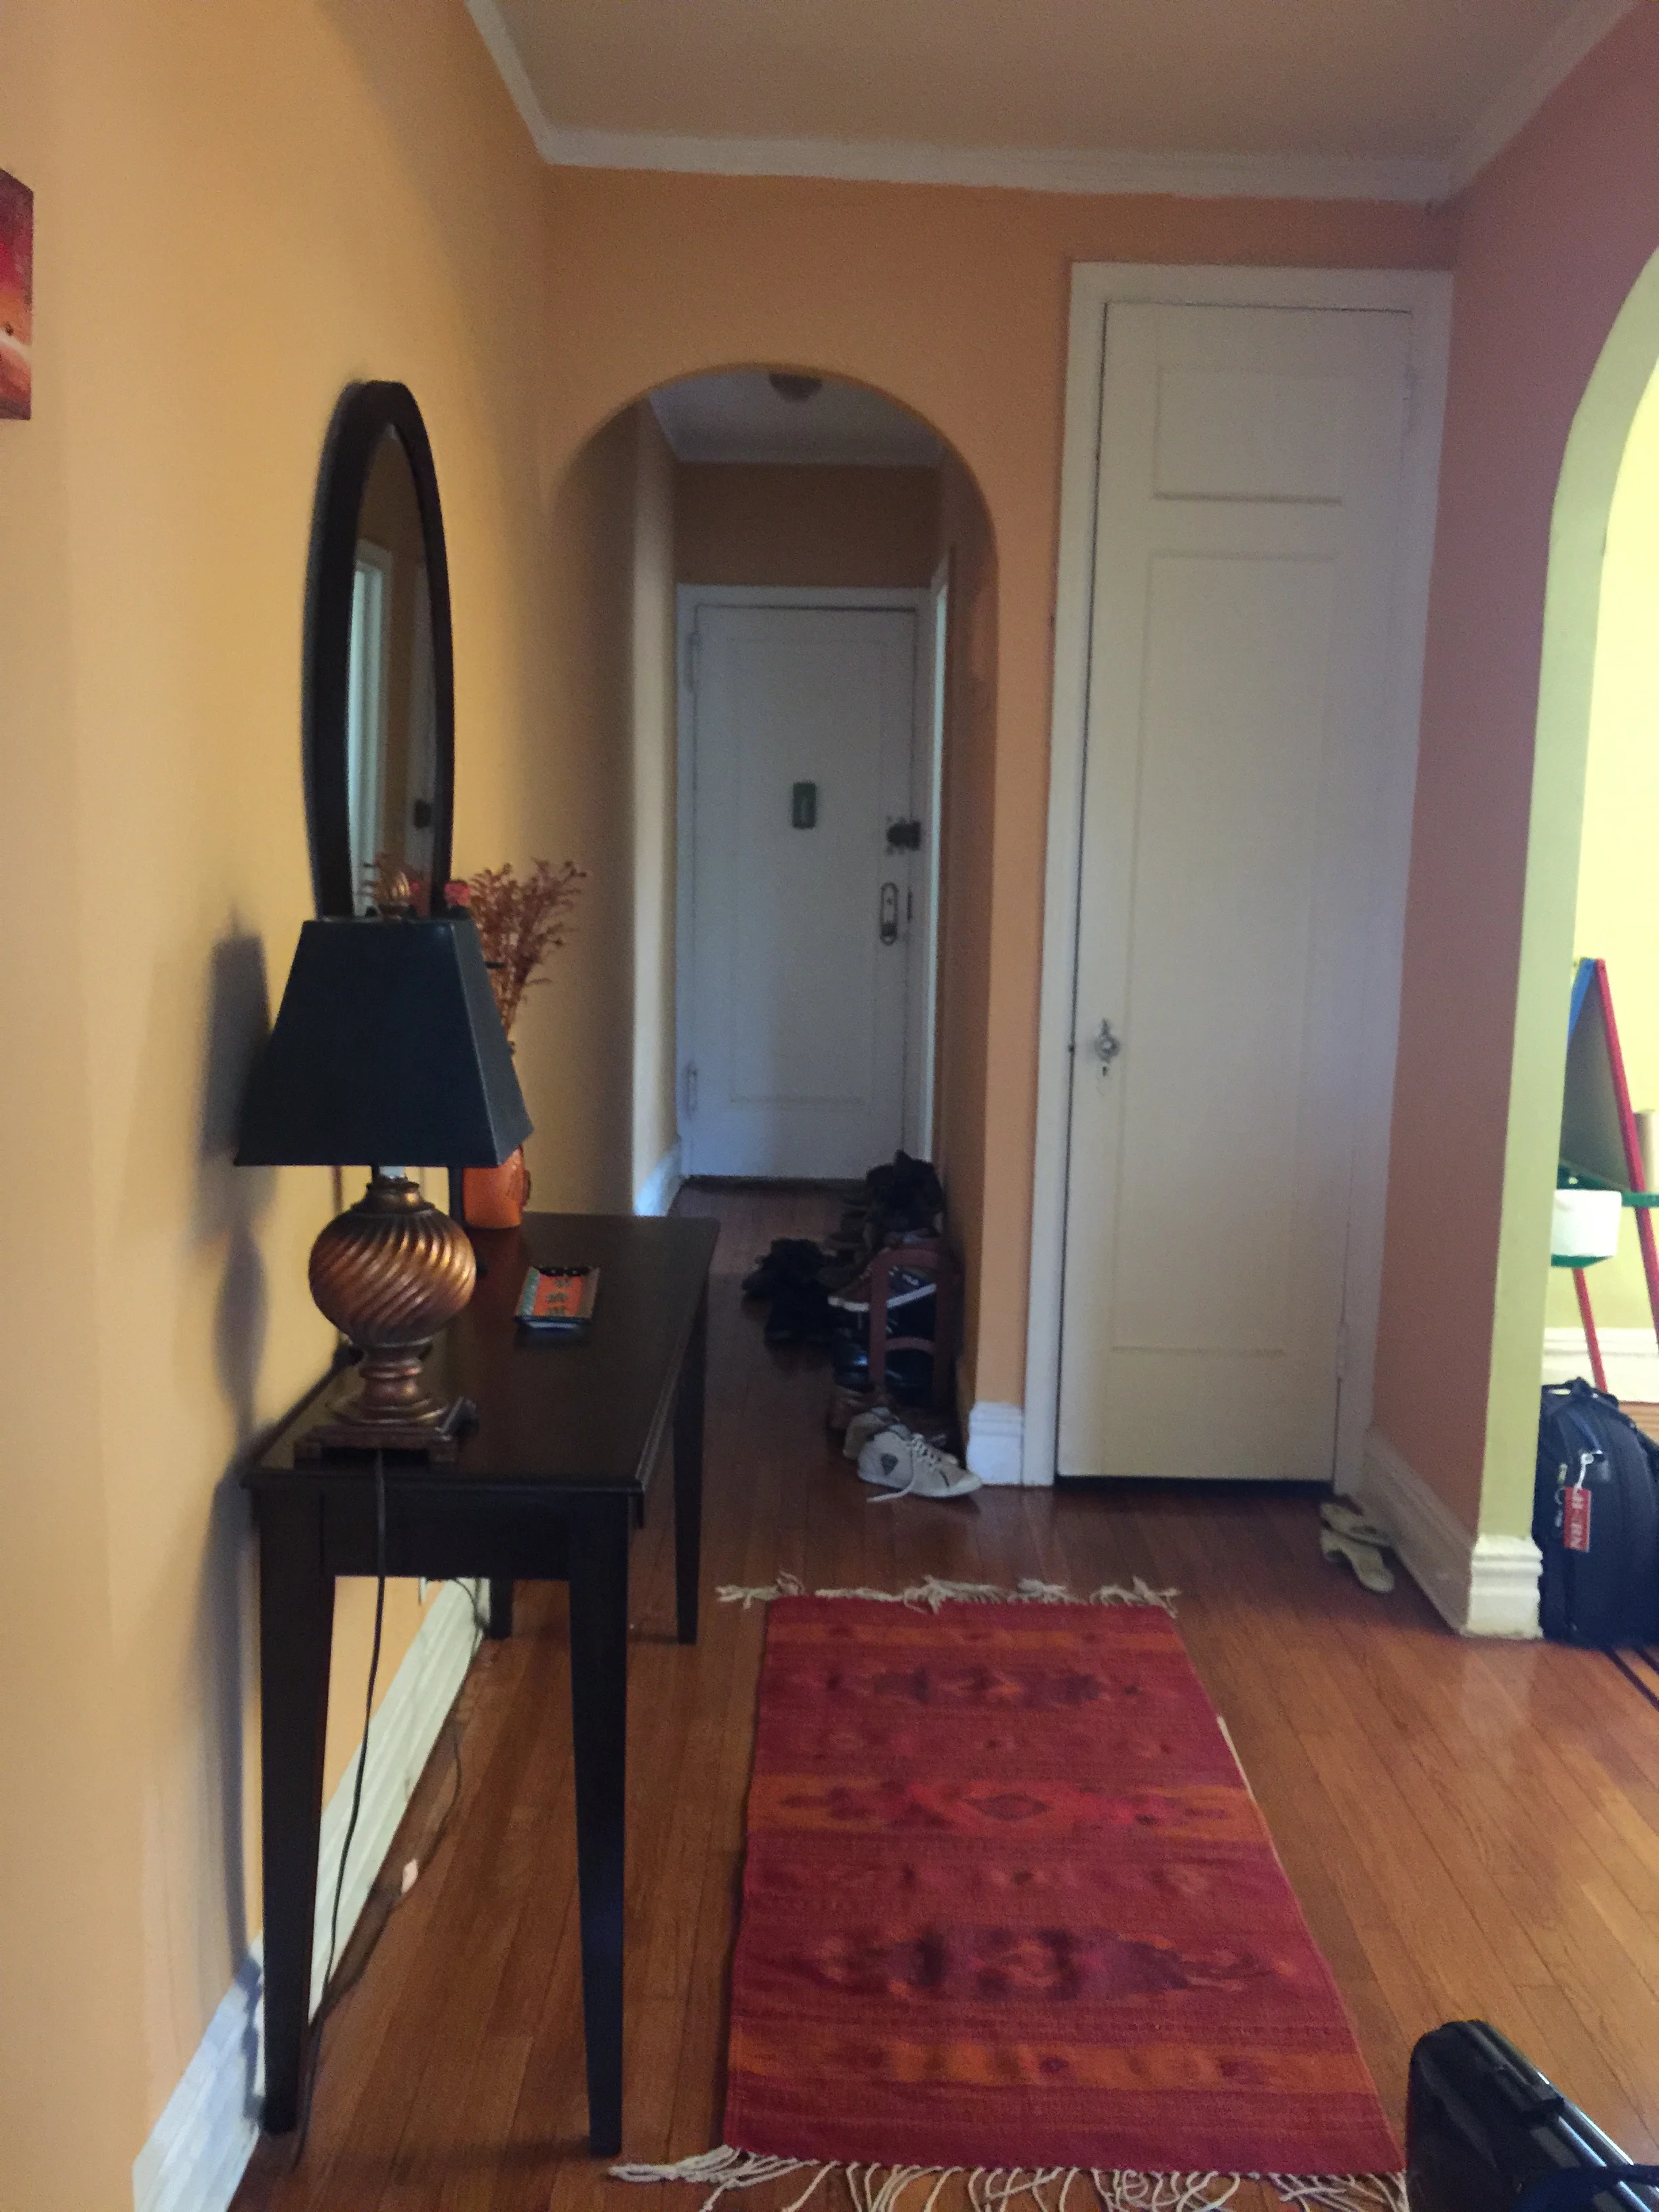
If you recall the dining room was painted something reminiscent of honeydew. The foyer? Cantaloupe. For obvious reasons, we extended the blue gray paint to the foyer. Without any windows, the same paint in the foyer creates a very different vibe, dark and moody in the best possible way. See the after below!
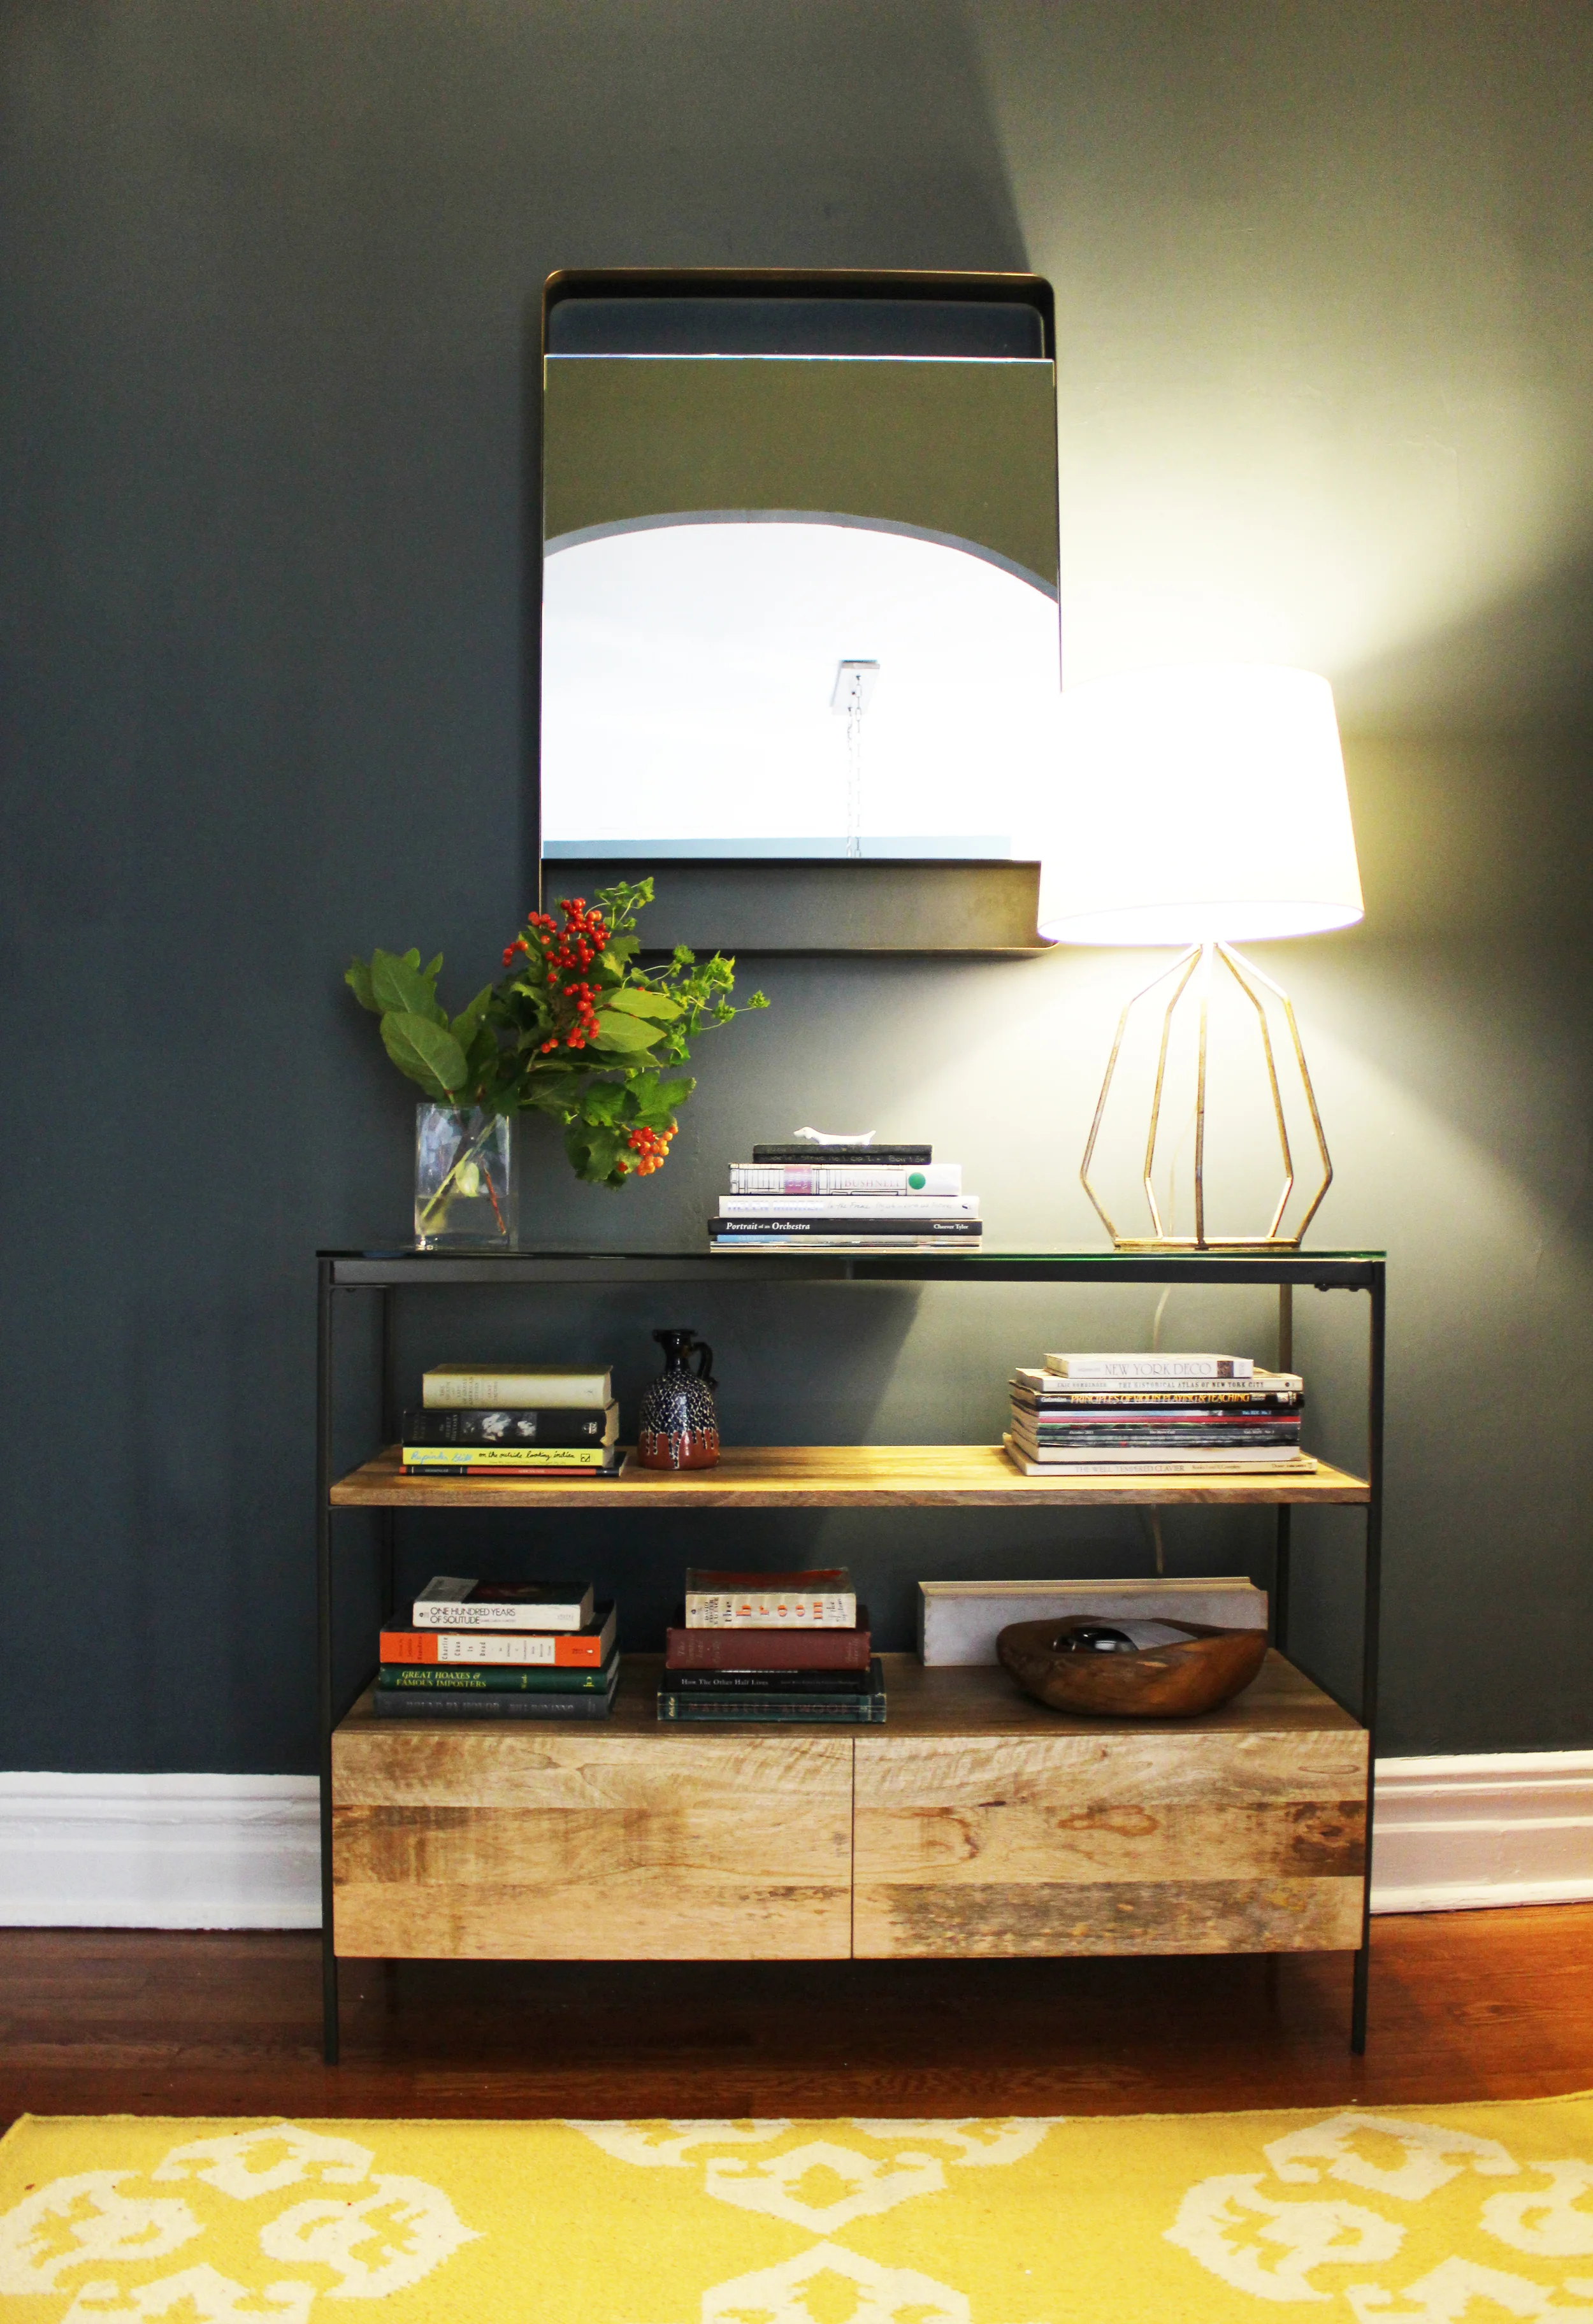
The foyer is open to the dining room. To keep the two spaces cohesive, I placed a yellow accent rug to touch back to the yellow chair in the dining room. The mirror above the console brings brightness and shimmer to this closed space and a great place to check your makeup before heading out! Here is one more close-up.
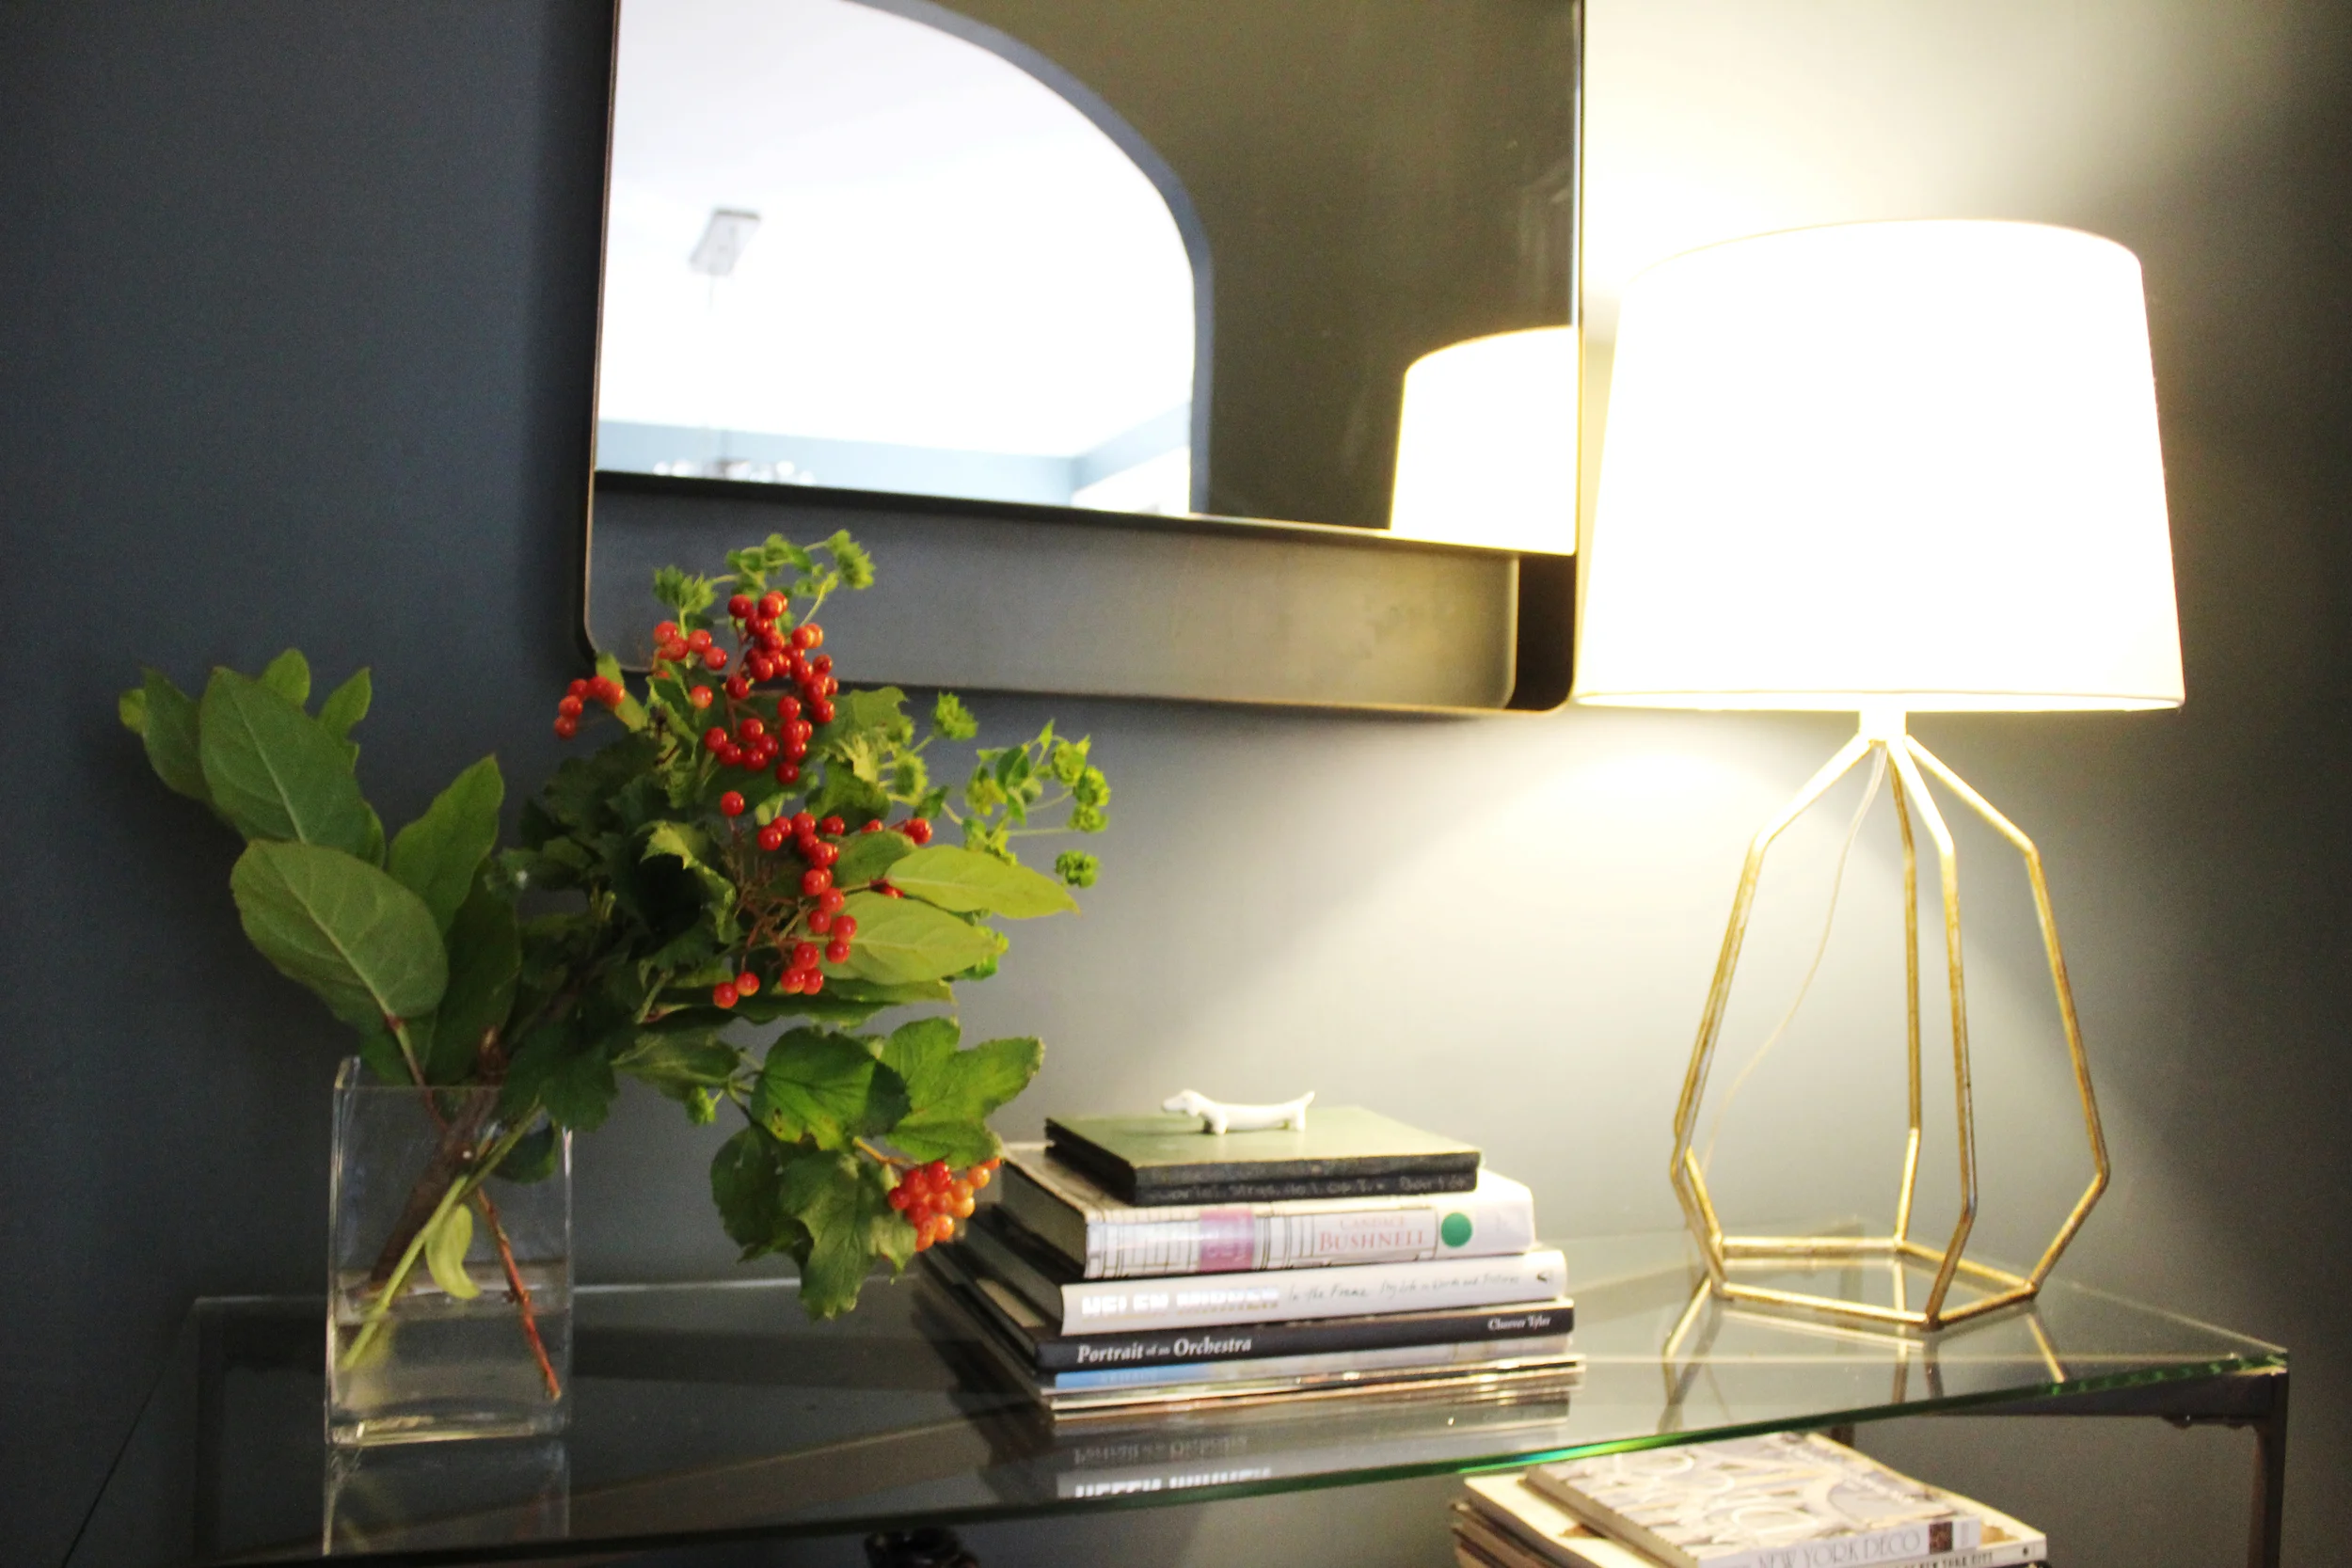
I love this brass table lamp. It pops against the dark walls and it has structure. This foyer sits between the front door on one side and the rest of the home on the other. So the lamp is great in that it not only provides light, but the skeleton silhouette allows for a clear line of sight from the front door to the rest of the home.
A lovely first home. I foresee many dinner parties that run late into the night for these clients, the only way to do it right?
And that's all folks! Thanks for reading.